
How to choose App Store keywords: a complete 7-step pipeline
A practical App Store keyword research pipeline using seed keywords, autocomplete, competitor analysis, and keyword difficulty scoring to build your 100-character keyword field.

App Store keywords are the only part of your App Store metadata users never see – all 100 characters of the keyword field exist purely to communicate with Apple’s search algorithm, not with people. right. Because users never see your App Store keywords, every character should be chosen to help your app appear in relevant App Store searches.
As they’re invisible, keywords attract more speculation, more effort, and more magical thinking than any other part of ASO. So, keep your approach simple: start with three core words that best suit your app, expand them into a long list of candidates, then use real data – autocomplete, competitors, difficulty scores – to boil that list back down to the 100 characters Apple gives you.
It takes an afternoon the first time, and maybe an hour when you revisit it.
One warning before we start: it’s all guesswork. Careful, thorough, and directed guesswork, but still guesswork – anyone who claims to “know” the algorithm really doesn’t. There are people out there convinced that finding just the right set of keywords will propel them to the top of the store, and that really isn’t true. Instead, what this pipeline does is help stack the odds, one step at a time.
The seven steps at a glance
Each step gets its own section below:
- Pick your three core keywords
- Expand into the long tail
- Harvest autocomplete
- Mine your competitors
- Score for difficulty and popularity
- Order by intent and relevance
- Pack the 100 characters
In short: three words become a long list, real data puts the list in order, and the top of the list becomes your keyword field. Let’s get into the specifics…
Step 1: Pick your three core keywords
Pick three words that really nail what your app does. Just three, written plainly, with no attempt at making them read naturally:
- meditation, sleep, mindfulness
- running, cycling, GPS
- calories, food, diet
- music, song, identify
- video, social, trend
- map, navigation, traffic
- job, career, network
- stock, trading, invest
Whatever your three are, they must lie at the very core of what your app does. Work the strongest ones naturally into the app’s name or subtitle where it helps a human understand the product. Apple treats the hidden keyword field separately from the customer-facing description and other platform-version information, so write the description to persuade people rather than repeating terms for an imagined search bonus.
And within those three, know which one is the one. I asked Adam Lyttle – who went from $200,000 of debt to over $1 million in app sales – for his top ASO tips, and his first was to focus on a single core keyword:
“It’s tempting to target as many keywords as possible but this seems to confuse the App Store algorithm. It helps to keep the app more aligned with a single core value and creates a stronger App Store listing.”
So: three words for your metadata, with one word at the heart of them.
Step 2: Expand into the long tail
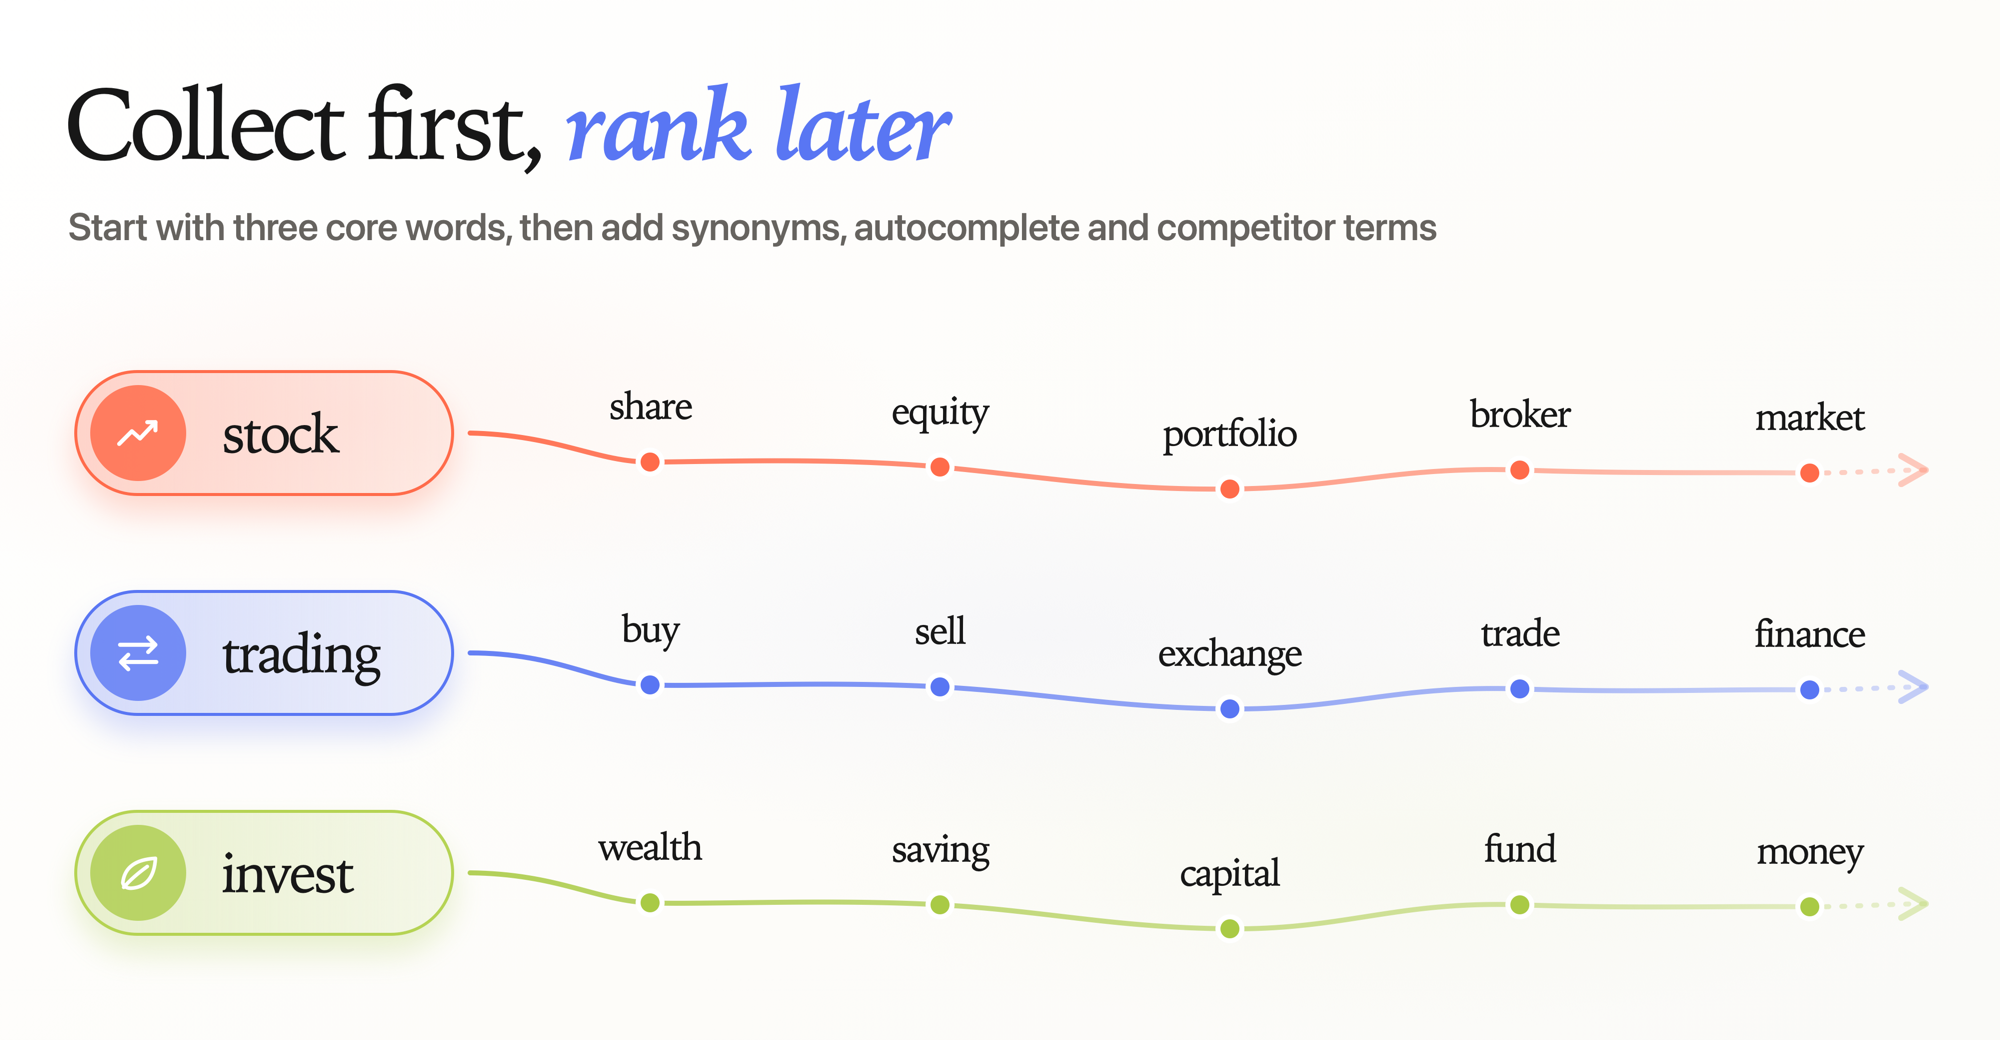
Next, start expanding your list. This step is a bit like mind mapping – you write down your core terms, such as “stock, trading, invest”, then draw lines off them and try to think of other words users might use: share, broker, equity, portfolio, buy, sell, exchange, wealth, saving, capital, finance.
We can’t truly know how effective the App Store’s vector search is – whether “budget planner” actually matches “expenses tracker” behind the scenes – so don’t rely on it. Instead, draw up good synonyms yourself.
Balance broad keywords against niche ones as you go. If you use only broad keywords you won’t rank well for anything, so a calorie tracker balances “health”, “diet”, and “food” with words like “fasting”, “keto”, and “macro”. Those are long-tail keywords: the big hitters get the lion’s share of searches, but the long tail is a gold mine of niches with lower competition – some of which you might be able to own outright.
Your goal here is a lot of keywords – far more than you could possibly use. We’re brainstorming, not editing, so don’t narrow the list down at all; you’ll likely end up with 200 to 400 characters of possibles, and perhaps even more.
Step 3: Harvest autocomplete
This step is homework, and it’s free: go to the App Store on a real iOS device and type your favorite keyword from the list into the search bar, then record what autocompletes.
Suggestions are dynamic, storefront-specific, and will vary with language, account, iOS version, and also time, so they show what the store suggested to you rather than how many millions of people searched for a term. Of course, if the App Store suggested those results for you, it’s going to suggest something very similar for other people too.
Factor those words into your list: if they’re already on it, nudge their priority up; if they aren’t, merge them in. Repeat this process for each of your three core words, as well as for any of the expanded terms you’re particularly keen on.
This is a free, live signal from the App Store, and bang up to date too. It belongs beside popularity, difficulty, relevance, and intent rather than trying to stand in for any of the others.
Step 4: Mine your competitors
Next, look at your competitors – specifically the words they use in their names and subtitles, which are sitting in plain sight in the search results. ASO tools can also show terms a competitor ranks for and infer likely targets, but they cannot read another developer’s hidden 100-character keyword field, so treat those suggestions as estimates.
My Kickstart app attempts to figure out competitor keywords using a range of heuristics, including scanning the title and subtitle, but also using OCR to extract words from their App Store screenshots, then correlating the whole list with their description.
What do the competitors know that you don’t? The answer might be nothing, of course; just because they shipped something good, it doesn’t mean their ASO strategy is actually working. If we assume they actually have a plan – and I promise you that’s a huge assumption – then the useful signal here is the keywords where they rank in the top 3, because those might prove to be specific attack vectors for you.
Anything they rank well for that’s missing from your list, merge in. You’re still not deleting anything – the list only grows through this step.
Step 5: Score for difficulty and popularity
At this point you have a long list and no way to choose between the entries, which is where data comes in. There are lots of services that attempt to score keywords for you, with Appfigures, Sensor Tower, and Astro being common choices; Kickstart does this on your Mac.
In Kickstart I gave each keyword a difficulty rating (how successful the top apps are) and also an entry barrier rating (how popular the #10 app is, because if you can beat that then you at least have a firm foothold).
 Tap for full-size (opens in a new tab)
Apple exposes a range of useful signals through Apple Ads (previously called Apple Search Ads) including keyword popularity and suggested bids. Those are advertising signals rather than a direct organic search count, meaning that suggested bids can reflect auction competition, conversion expectations, geography, and advertiser behavior as well as demand. You don’t need to run an ad to use the research, but you do need to label what the numbers are.
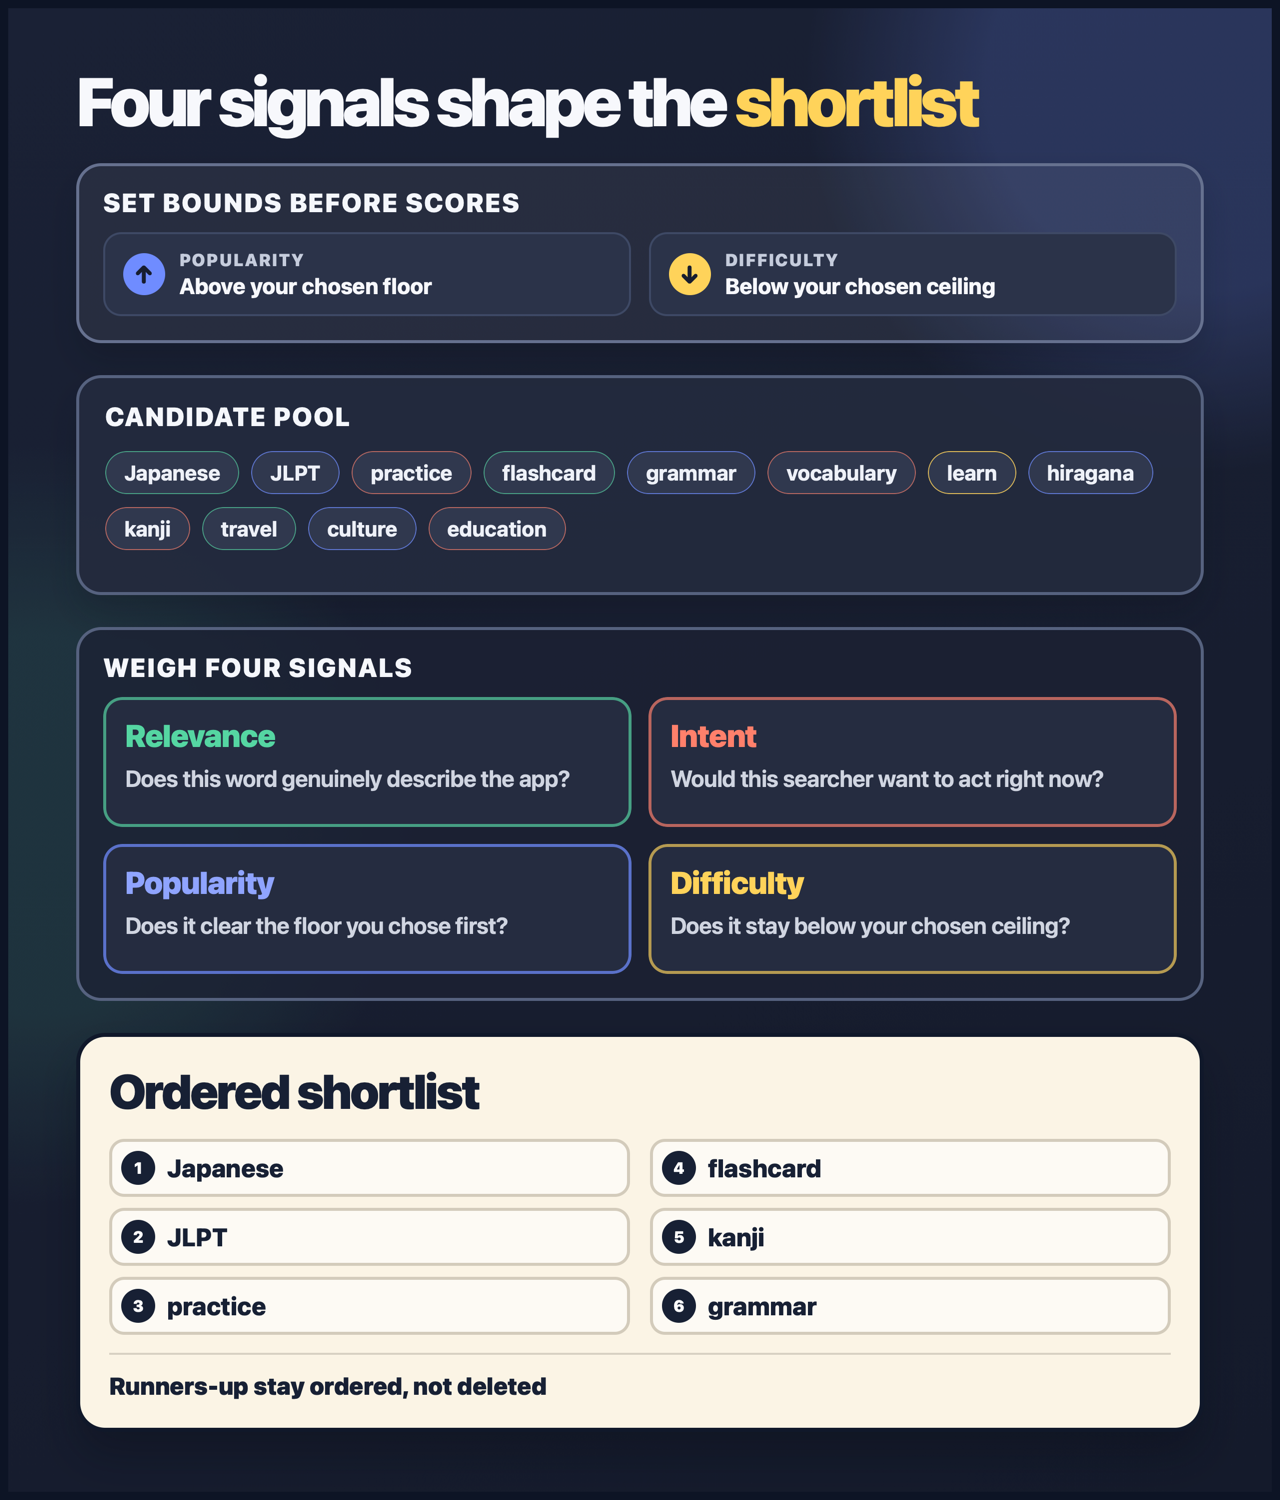
Now, the important part: set your bounds before you look at any numbers. The perfect keyword has 100% popularity and 0% difficulty, and those all went years ago – so decide on a lower bound for popularity and an upper bound for difficulty first, then dive in and see what clears the bar.
And those bounds depend entirely on your app. Many years ago I read the transcript of a speech by – I think? – Marc Andreessen, called “A Million Hits a Day.” That was the sign of a big website back then, but his point was that even one person landing on your site was great… if you sold nuclear power stations. Maybe the popularity you’re targeting is under 20 because your app serves a niche so small your entire user base could hold a meetup in your house – in which case go to town. Own that niche.
Step 6: Order by intent and relevance
You now have scores, so put the list in order: popularity vs difficulty, weighted by how well each word actually fits your app.
Don’t delete potential keywords as you work. All you’re doing is ordering, with the most important at the start and the least important at the end – you’ll want the runners-up later, both for the advanced move in step 7 and for the next time you revisit this.
There’s one more sorting signal, and it’s the one most developers skip: intent. Sales people love talking about high-intent keywords – words a user types when they’re ready to act now – as opposed to low-intent keywords, where someone is just curious and researching. On the App Store, only the former really works, because people are nearly always searching for something they want right now.
If you were making an app to learn Japanese, high-intent keywords are things like learn, Japanese, flashcard, grammar, vocabulary, practice, hiragana, kanji, and JLPT. Low-intent keywords are things like Asia, travel, culture, and education.
Struggling to feel the difference? Compare “study app” with “JLPT practice” – JLPT is the Japanese Language Proficiency Test, so someone searching for JLPT practice knows exactly what they want, and they want it now.
Nudge the high-intent words up your list and the low-intent words down. And if you’re getting attached to your enormous, beautifully-ordered list, here’s Matteo Spada, who builds the ASO tool Astro, with a bucket of cold water:
“There are probably only 20 to 30 fundamental keywords that represent the core search intents users have.”
So, twenty to thirty keywords carrying everything – keep that number in mind as we head into the final squeeze.
Step 7: Pack the 100 characters
Apple gives you 100 characters of search keywords, and that’s including the commas between them – you’re looking at maybe 10 to 15 words. Here’s how to spend them:
- Take words from the top of your ordered list, separated by commas with no spaces: “fasting,keto,macro” fits more than “fasting, keto, macro”.
- Don’t repeat any word that’s already in your app’s name or subtitle – it’s indexed from there, so repeating it here just burns characters.
- Skip your category name and, per Apple’s guidance, plurals of words you’ve already included in singular form.
- Leave out trademarks and other apps’ names – keyword misuse is a common rejection reason, and it’s not worth the risk.
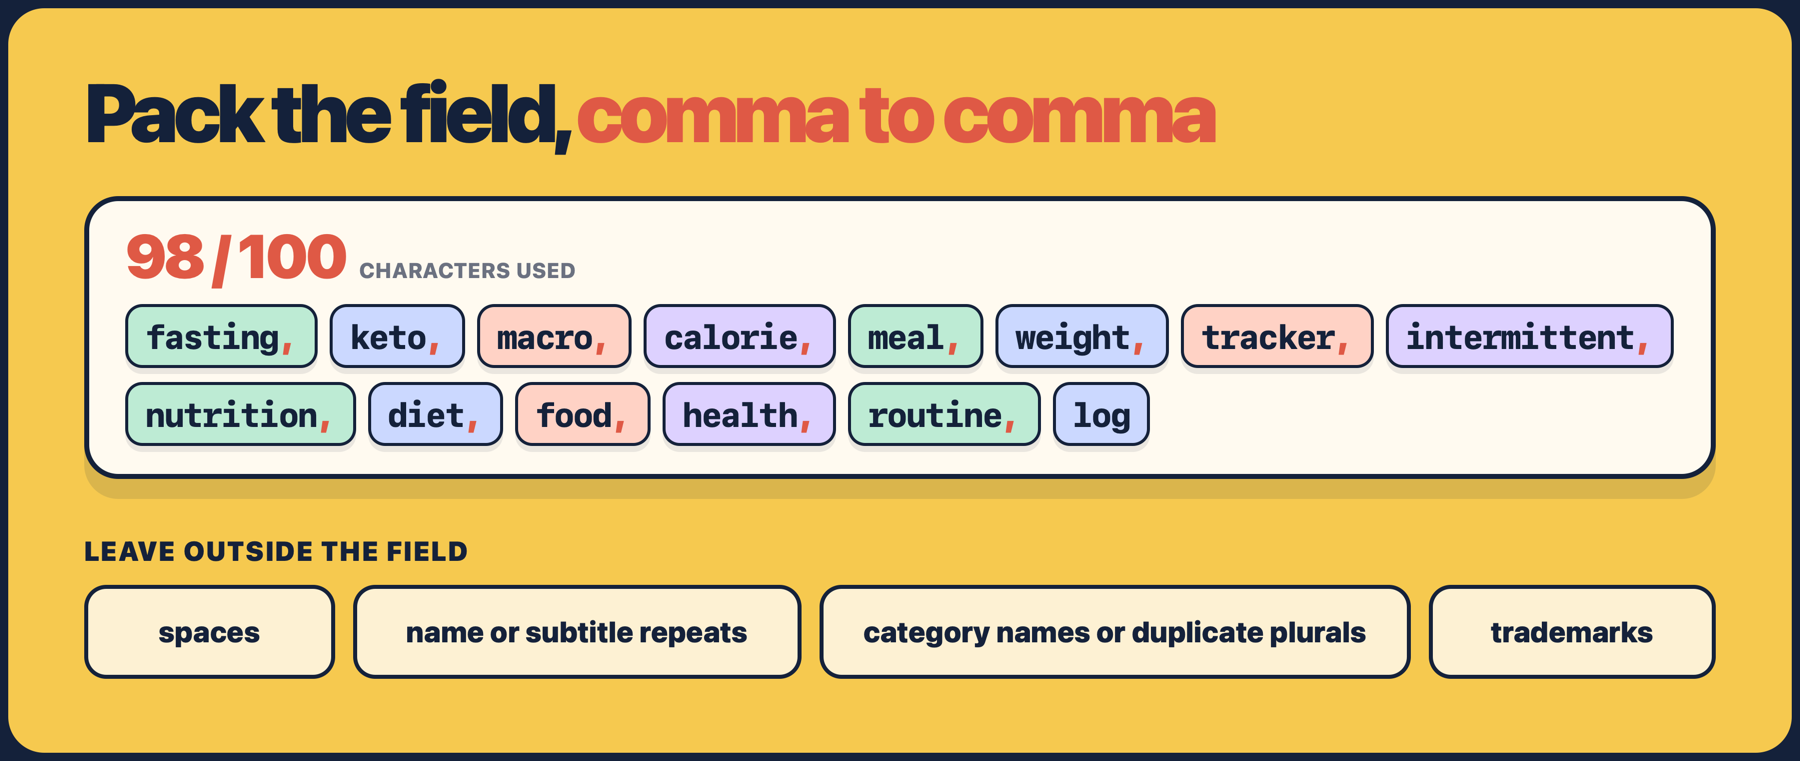
So the recipe is simple: your best unused words, crammed comma-to-comma, with nothing wasted on repeats or risk.
For a concrete example, here is a 98-character field for a hypothetical nutrition tracker, assuming none of these words already appears in its name or subtitle:
fasting,keto,macro,calorie,meal,weight,tracker,intermittent,nutrition,diet,food,health,routine,log
That is the final check to perform on your own field: count the commas, check every term against the visible metadata, remove trademarks, and know why each surviving word earned its bytes.
As you pack the field, remember Adam Lyttle’s second tip: this isn’t keyword stuffing, it’s strategic placement across your name, subtitle, description, and keywords – “Constantly finding the right balance between educating the algorithm and appealing to users (those people who actually download the app) is key.” The algorithm gets you seen; humans decide whether to tap.
Which leaves an obvious question: you ordered 200-plus characters of good keywords, Matteo says 20 to 30 words matter, and the field holds 10 to 15. Where do the rest go?
In another localization’s keyword field. Apple maintains a comprehensive list of languages supported by each of their regional stores, and it’s huge – the United States store, for example, supports US English as its primary language, but also Arabic, Chinese (Simplified), Chinese (Traditional), French, Korean, Portuguese (Brazil), Russian, Spanish (Mexico), and Vietnamese.
You don’t need to localize your app in those languages in order to use their keyword field, so give it a try. But, as with everything here, test it carefully – try one coherent localization first, measure it, and read the caveats before expanding.
Stop reading, start doing
Keyword research is never really “done” – rankings wobble, competitors shuffle, and your list deserves a fresh pass every month or so.
But your first pass can start today, with these four steps:
- Write down your three core keywords, then check they appear in your name or subtitle (not both) and your description.
- Spend ten minutes mind-mapping synonyms, then type your favorites into the App Store on a real device and harvest the autocomplete.
- Score and order the full list – bounds first, numbers second – and don’t delete a single word.
- Pack your best unused words into the 100-character field, commas and all, and ship the update.
Start with three words, then use the noisy data to make a judgement you can explain.